
This month, we’re tackling something big, our largest survey of 2025 so far.
We’ve been mapping a vast former surface mine in the heart of Wales’ mining country, a site perfect for drone surveying. Drones slash site time and capture details impossible to achieve on foot, but navigating a project this size comes with its challenges. So, let’s dive into our process, from planning to final delivery, and show you how we tackle complex terrain with precision.
The Job
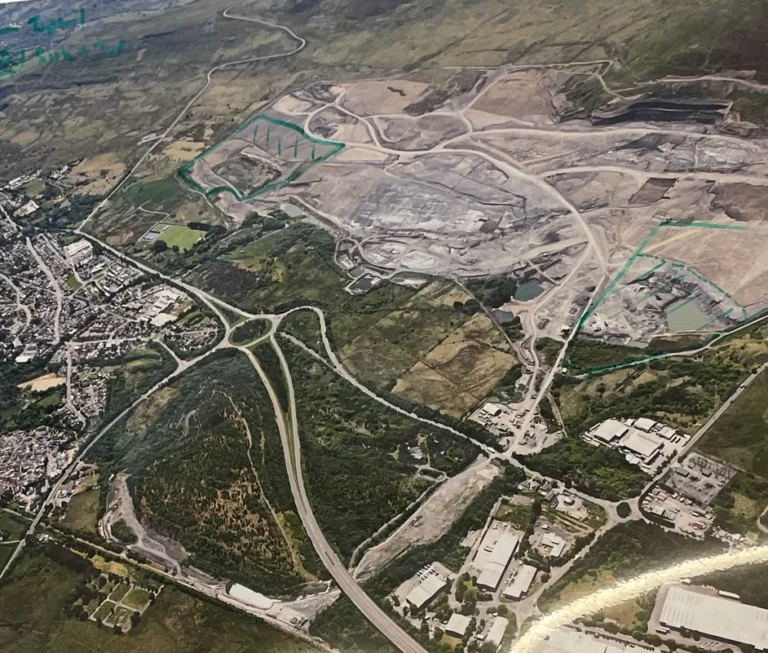
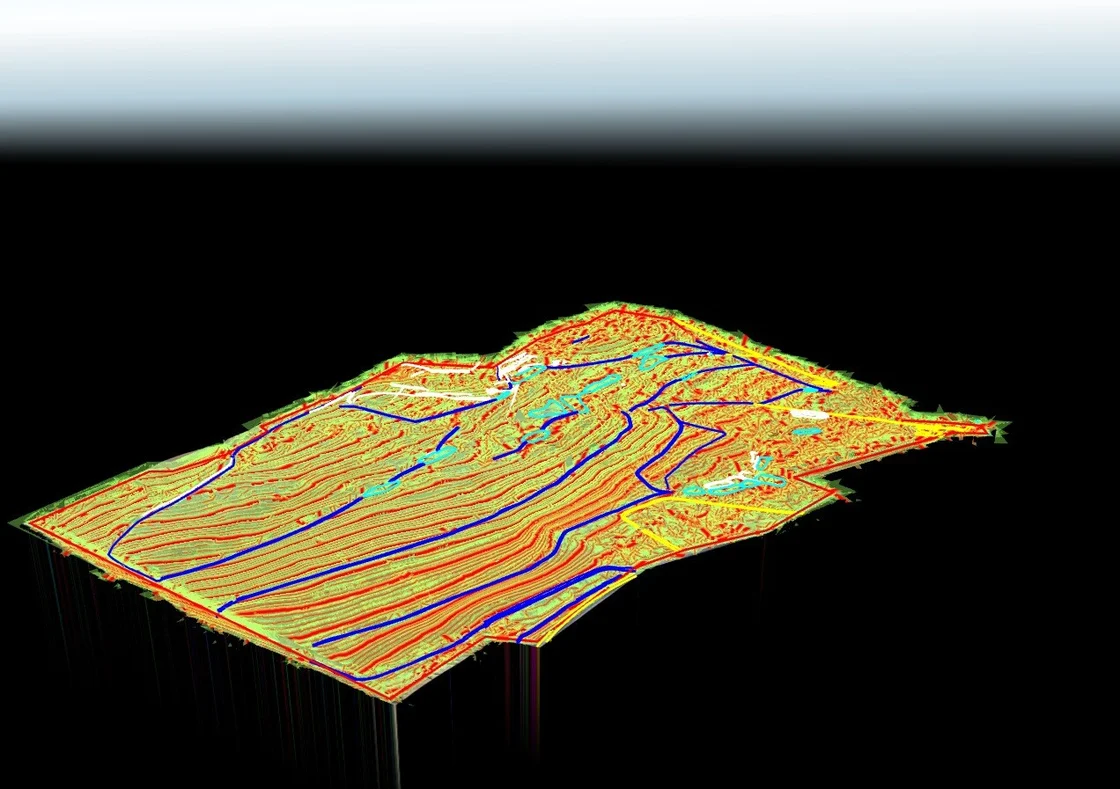
Our site is big, c.200ha of former deep and surface mine in the heart of the South Wales Coalfield. In its most recent manifestation, an open cast mine was worked until 2017 with a commitment then to restore it to an agreed profile. Our task: to make an accurate model of its current state ahead of handover and any potential future development.
Step 1 – Planning
Simply piling into a job like this is never a good idea. So, we worked through a number of key questions:
1) How will we access the site? Can we use vehicles (answer: no!)
2) What is the state of the land? Are there trees, buildings, water etc. which will hinder us in gathering true ground elevations?
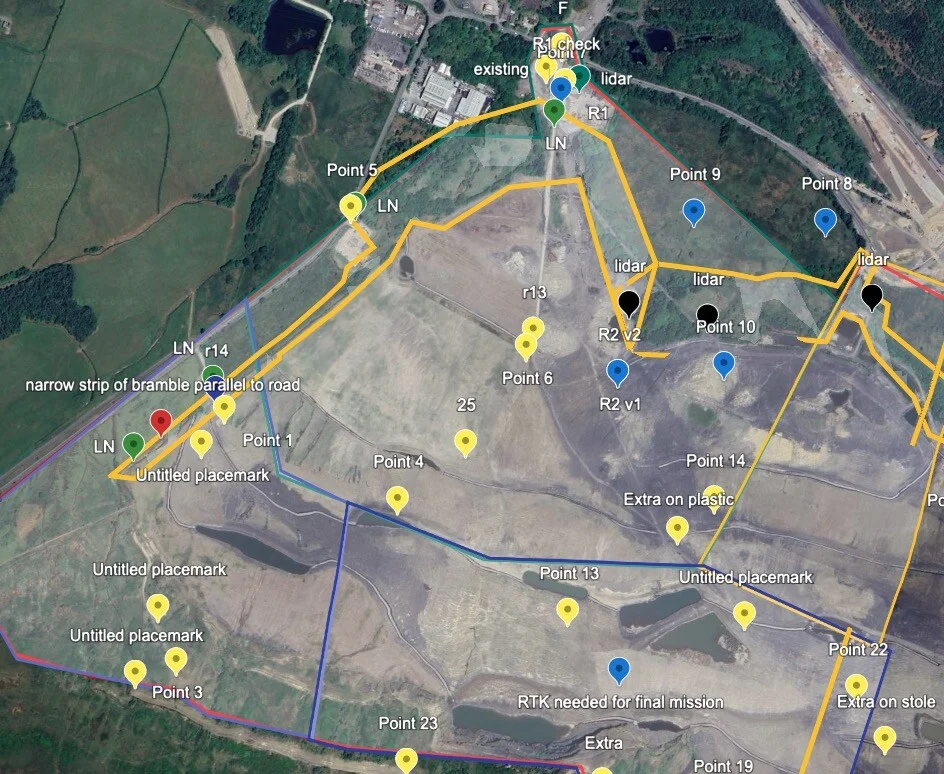
3) Where will we position ground controls points (GCPs)? And what equipment/methodology will we use to establish them?
4) Are there any significant restrictions? e.g. any restricted airspace?
From this, we determined that a mixed survey approach was going to be best. A lot of the site was basically bare earth, suiting photogrammetry. But trees and vegetation in some areas dictated that we would use LiDAR in targeted locations.
On Site
In my experience, a well-executed job like this is roughly 75% planning and only 25% execution. And this one wasn’t much different.
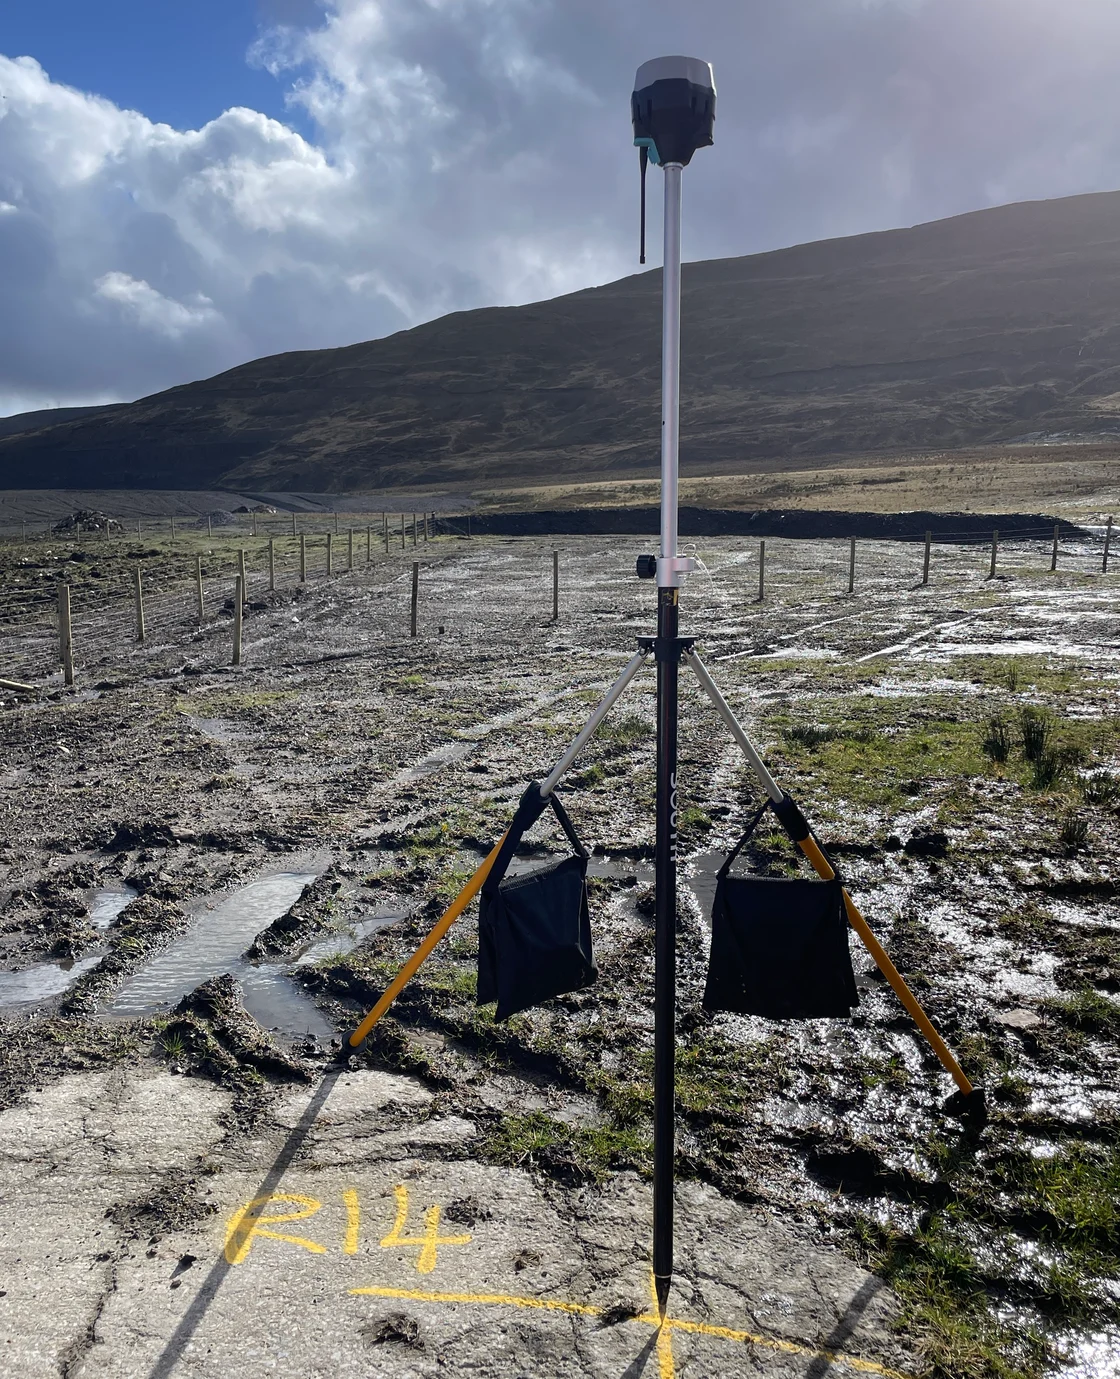
Our main challenge on site was to install the necessary control where we wanted it given the limitations of access. When using GPS rovers, our preference is always to establish a reliable base location and then use that as the reference for all other stations. This mitigates the potential risk of bad fixes from third-party reference stations and also tightens the accuracy of the GCP network to, in theory, around 1cm in xyz. There’s a more practical challenge too – to stop everything blowing over in the wind (hence the sandbags!)
In Flight
Although most people focus on the flying bit of the drone world, it’s actually the easiest and quickest part of the operation. If everything has been planned properly, the drone really just does its thing. Our job is to make sure that it’s covering the expected ground, and that the imagery and LiDAR scanning are being captured within acceptable specifications.
Equally, this isn’t a time to lose concentration. A mistake now will cause us major grief when we get back to the office!
Processing – Step 1
For this job we had two sets of data to process: photogrammetry and LiDAR.
Our photogrammetry processing is done in Agisoft Metashape. This allows us to align all of the stills images (14,000 in this case) and optimise the model to our chosen control points.
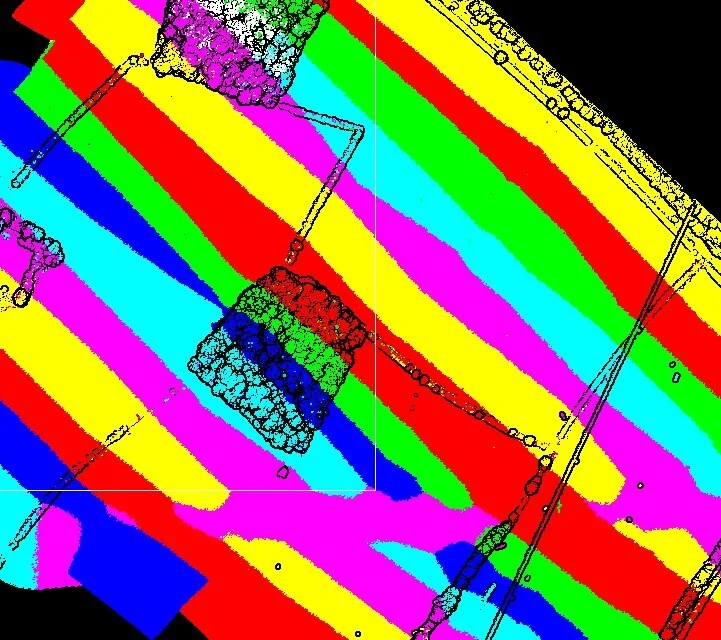
For LiDAR, we go through two steps. Firstly, DJI Terra extracts the raw data and integrates it with inertial data from the drone to produce a first-level point cloud. We then bring this into the fantastically capable, but deeply unintuitive, Terrascan. This is a vital step where we eliminate overlapping data from each pass of the drone and perform some further optimisations to reduce noise and optimise to control points.
Processing – Step 2
Now, the vital step of producing a file that our client can actually work with. So far, we have produced 14,000 images and approximately 30Gb of point cloud data. None of this is of any use to our client!
Our go-to tool for this stage is Virtual Surveyor. I can’t sing its praises highly enough when it comes to honing a dataset down to a manageable output. This is where we perform a bunch of operations including:
- removal of anything not relevant to the survey (e.g. vehicles, fencing, buildings, trees)
- selection of what data to use where (photogrammetry for bare-earth, LiDAR for trees and vegetation)
- flattening of all water areas to remove extraneous elevations
- checkpoint analysis to confirm the validity of our data
Finally, yes finally, we create a grid of survey points which we use as the basis for a 3D triangulated mesh. This is our final representation of the topographical surface.
It’s a wrap
As always, we’re already gearing up for the next big project. But we also believe in taking a moment to reflect. Every job teaches us something, ways to be more efficient, small mistakes to avoid next time, and lessons that make us even better. What matters isn’t the missteps, but how fast you spot and fix them.
Thanks for reading, we hope you found this insight useful.
If you’ve got a large-scale survey on the horizon, we’d love to chat.
Get in touch and let’s make it happen.