Terrain Following for Drone Surveys
Using Satellite Data for Better Results
‘Terrain Following’ is vital to good mapping results with drones. In essence, the objective is to maintain the distance from ground to drone as precisely as possible. On a small, flat area it’s easy. Set your height and fly. But what if the land is undulating? What if you are trying to survey a quarry with its stepped rock faces? Or a hillside where the land may rise and fall as much as 100m during the flight? This is where terrain following comes in.
Plan A – Realtime Follow
The easiest method, available on drones such as the Mavic Enterprise series, is optical terrain following, or ‘real-time follow’. Here, the drone computes the height above ground using the parallax offset between its two downward optical sensors. Easy, on the face of it. Except, for two flaws:
1) There is a limited sweet spot of heights where the system actually works, generally around the 60-70m mark. And we are not necessarily looking to fly at that height
2) The system can get mightily confused in some scenarios, especially where there are repeating patterns in view. Solar farms, for example, can see the drone suddenly misinterpreting the information below. A dramatically descending drone, mid-survey, is not an uncommon experience.
Plan B – Map it Twice
It sounds daft, but the next (and best solution) is to map the terrain twice. The first time is just to create a DTM (Digital Terrain Map) which can then be loaded back into the system (e.g. DJI Pilot) and used as the basis of optimised terrain following. Great in principle, but unless you carry the necessary software for processing in the field this is not the most convenient of options.
Plan C – Use Satellite DTMs
This is our preferred option. But it’s definitely got some banana skins.
There are two datasets which are freely available to use as imported DTMs:
Firstly, the good old Japanese kindly gave us ASTER (Advanced Spaceborne Thermal Emission and Reflection Radiometer), which mapped global elevation levels using a stereoscopic imaging (much like real-time follow above) but now FROM SPACE. In its first iteration there were issues with both resolution and accuracy, with some alarming artefacts which could randomly throw your survey into total disarray. However, Version 3 brings global 30m resolution and reduced artefacts, and this DTM can be imported directly into DJI Pilot missions with the click of a button.
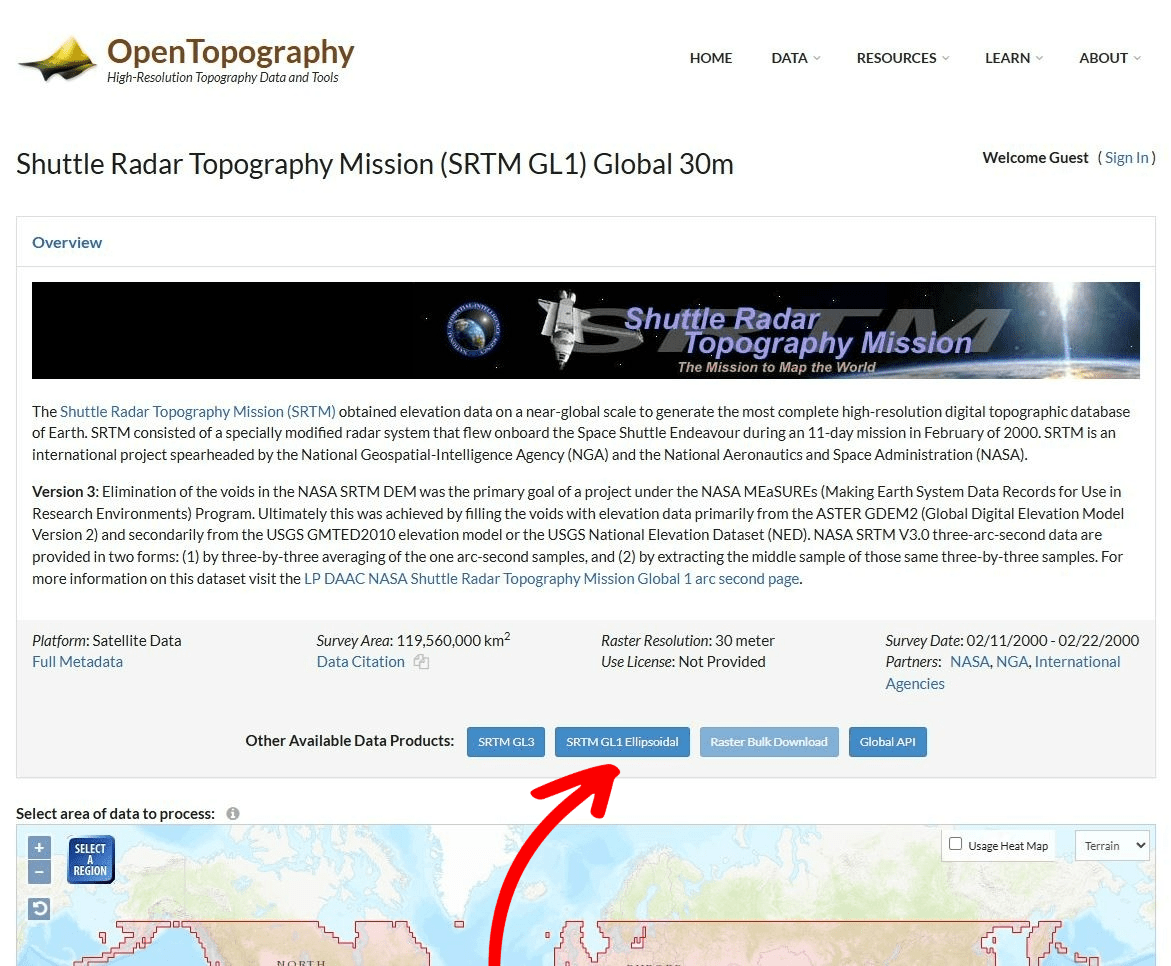
Second, there is the SRTM (Shuttle Radar Topography Mission) directly from NASA which offers similar resolution to ASTER but derived from radar data. Importantly, you need to be sure to select the 1-arc-second Ellipsoid dataset, or you will quickly be up the elevation creek on your mission.
Which is Better? ASTER or SRTM?
Back in the day, this was easy. SRTM beat ASTER V1 hands down, but now things are not so simple.
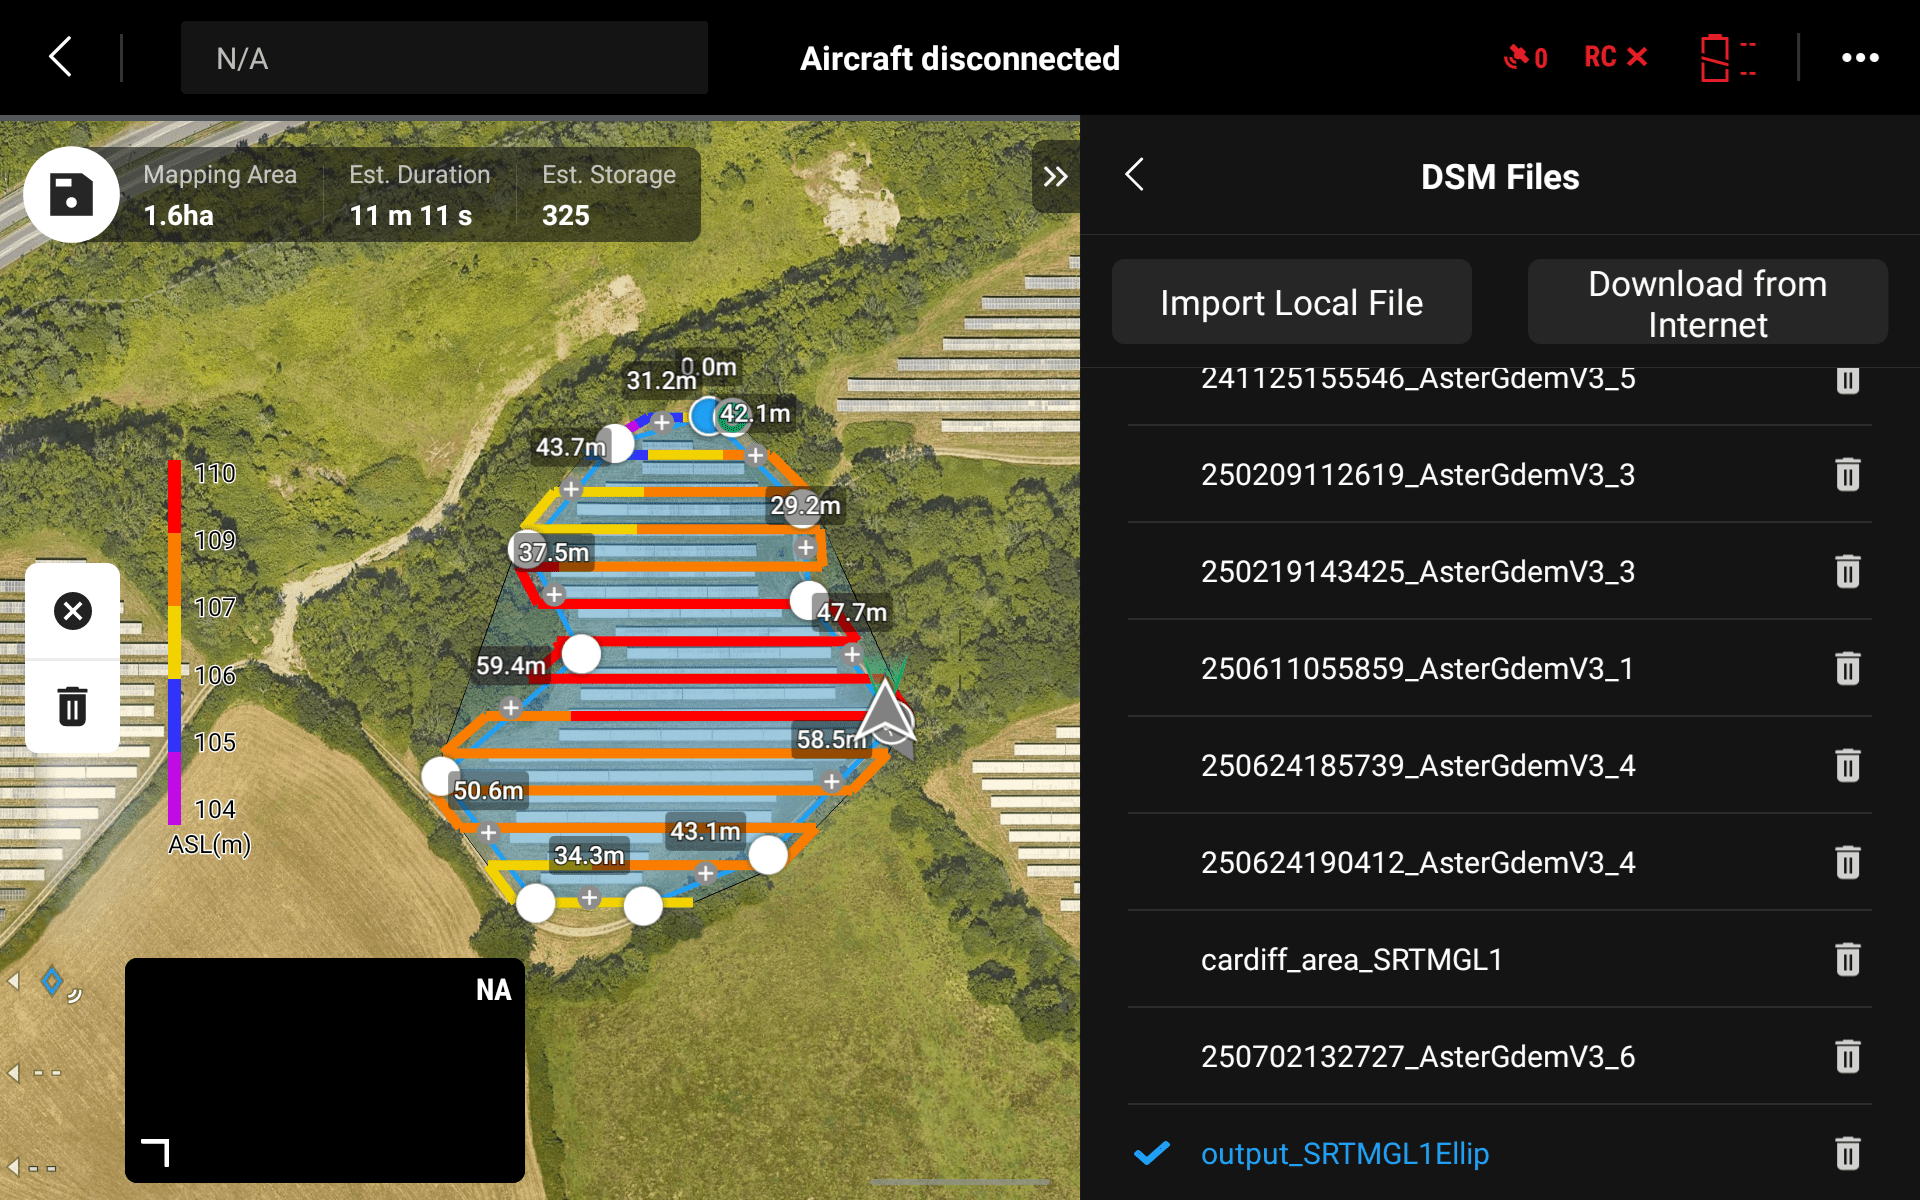
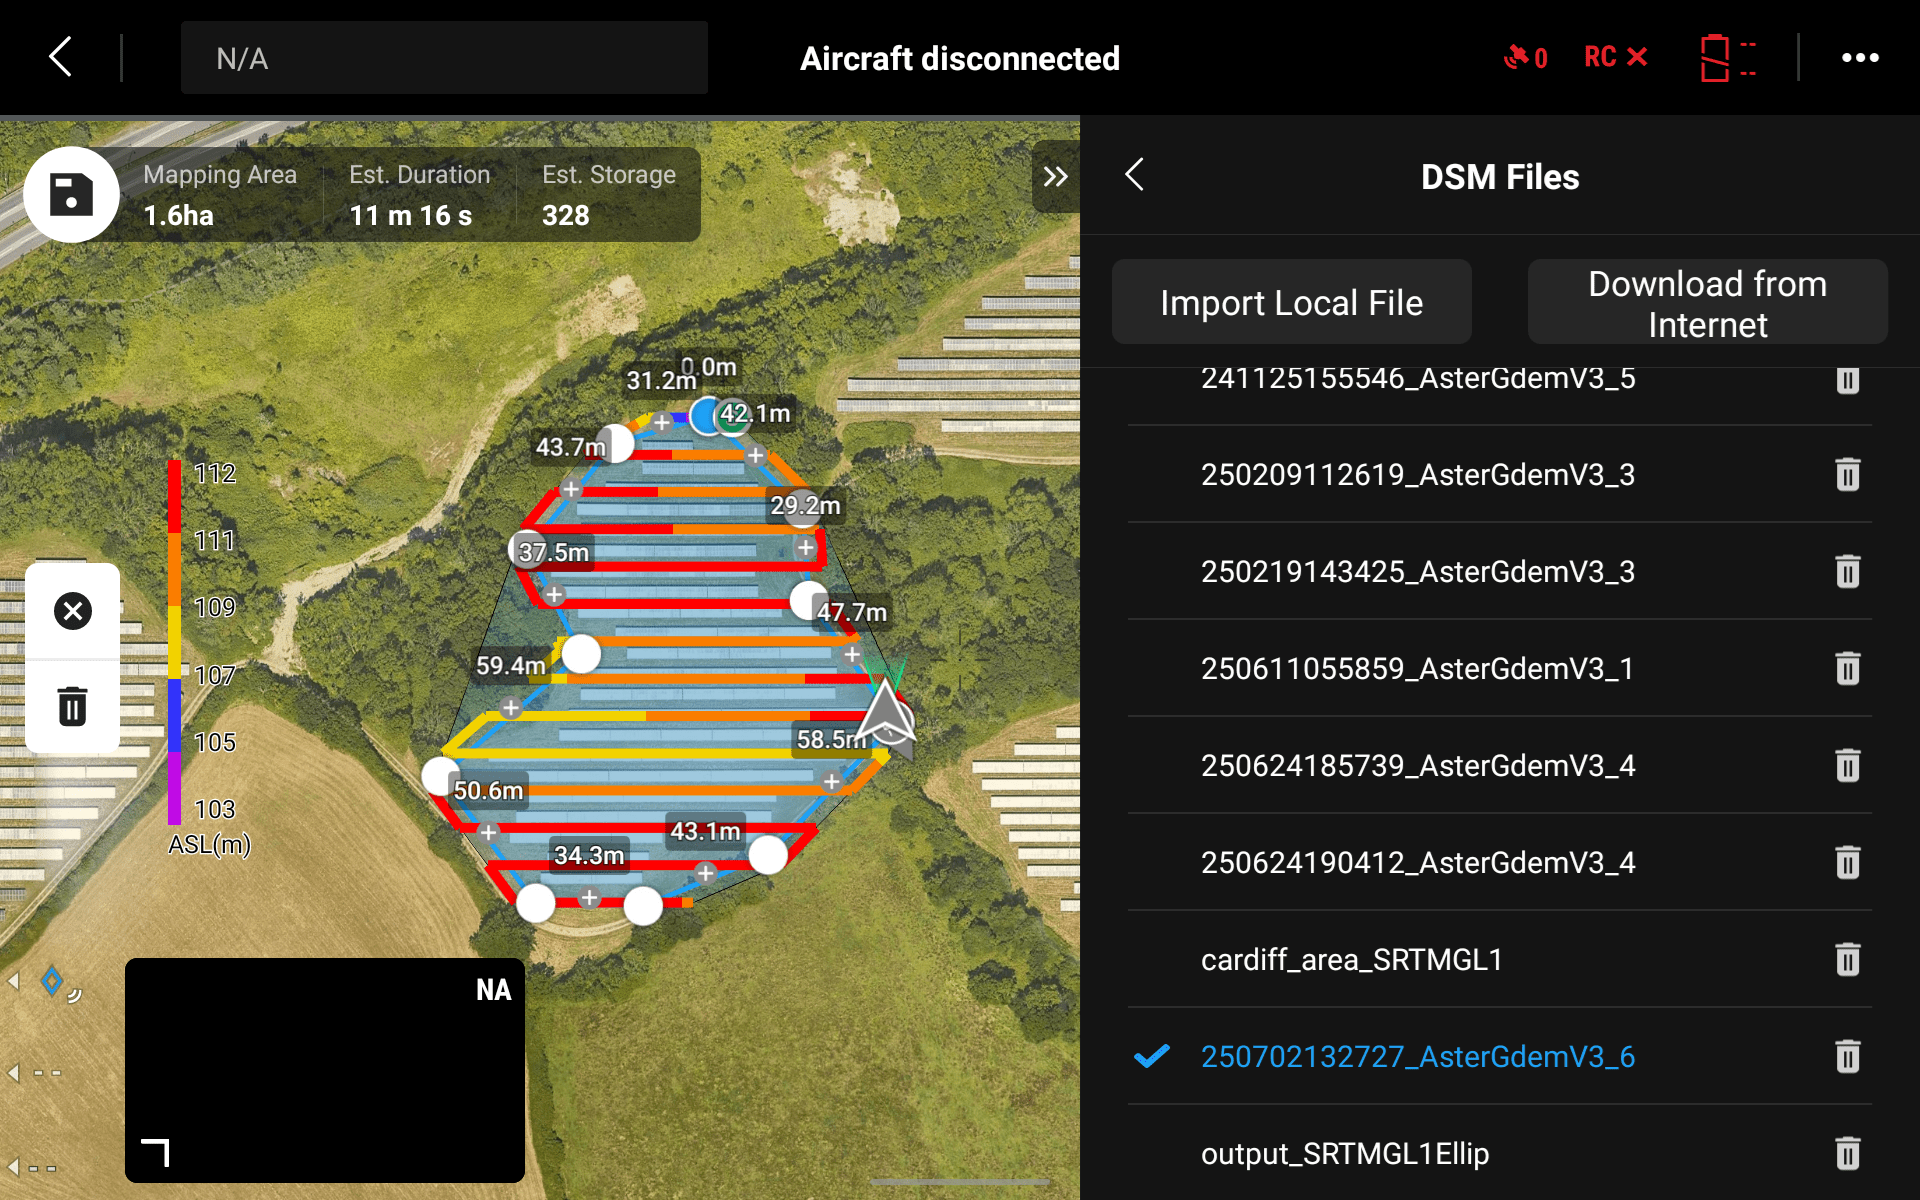
Below is the same area planned to use each of the two datasets (SRTM then ASTER). On the plus side, both sources have positioned the survey area at basically the same altitude (i.e. elevation above mean sea level). However, whereas the SRTM has the site continually falling away in altitude from mid-point to south, the ASTER indicates a small rise in the south of the site. As it happens, the difference is not sufficient materially to affect our survey.
So, which is better? In short, both. And neither. In my experience, there simply isn’t a ‘winner’ in this battle. ASTER is sometimes more faithful to the true elevations, and sometimes less so. ASTER is more recent (the SRTM mission was two decades ago) so any site subject to development may be significantly ‘out’ on SRTM. However, ASTER still appears to be full of artefacts, especially in the vicinity of water which is famously the nemesis of stereoscopic approaches.
My tip: carry both in your armoury and monitor carefully the data during capture. If the height above ground appears to be varying significantly, there is a good chance that switching the source DTM will solve the problem.